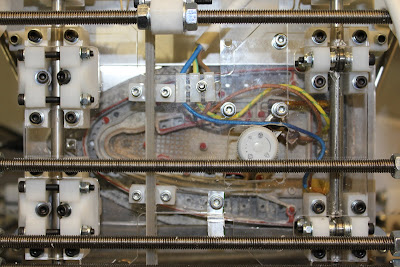
During the last session (which was around 15 months ago) I managed to burn the extruder heating circuit. The heating element had short circuited and burnt the transistor, even melting the nylon bolt fastening the transistor to the heatsink. On further analysis it transpired that there was nothing wrong with the nichrome wire itself but the problematic component was the wire that was crimped to it. I had used ordinary wires to transport current to the nichrome wire and their insulation burnt off to a charcoal electrically bridging the two wires together.
I have now replaced the wires with ones that were originally used in the iron which I scavenged to heat the print bed so hopefully they should be more resistant to thermal degradation. I also replaced the extruder heater control circuit with a voltage and current limited bench power supply (PSU). This gives me the ability to manually adjust the amount of current flowing through the heater (hence the temperature) and allows me to monitor the voltage drop across the heater through the PSU display. Its also a quicker way to get started rather that buy any components to rebuild the circuitry.
After re-lubricating all the bearings, fine tuned the limit sensor adjustments and replaced some heat-sinks on the stepper motor drivers, I fired up the printer. I also acquired a low spec computer from a friend (Pentium 4... remember those?) but this machine should serve well for its purpose. The only issue is that I don't have an additional monitor to connect to this machine, however I did get an iPad2 for Christmas so I am using a remote desktop software running on the iPad and connecting to the computer. Not the ideal solution... but it works. Who said you can't print to a RepRap from an iPad? ;-)
I installed a fresh copy of the Reprap Software and by then both the heated bed and the extruder where at optimal temperature. I decided to tweak the RepRap settings as a start until I was happy that the print quality is good enough for generic printing. When I had built the Reprap, I had a spacer left over which was only used to calibrate the alignment of the print bed. The spacer was small enough to print quickly but complex enough to highlight any defects (or potential improvements) in the settings. For reference, the part name is bed-height-spacer-31mm_1off.stl and a 3D image below. Since I already have the part available and the print quality of it is extremely good, I also had a means of comparison.
Well... long story short, I printed with the default settings and although the result wasn't too bad, the edges where quite rough. The image below shows the print attempts. As you can see the ABS I am using is yellower than the original print (right) but this ABS has been sitting in the garage for 2 years and I'm not fussy about the coulr for now. Print number 4 being the best print, although one of the edges still has some blobs. This is where the printer starts printing the layer. It can be easily eliminated by setting the ExtruderX_MiddleStart=True.
Some more tweaking should improve the print a little bit more, but at this stage I want to get started on other projects which will involve parts printed with this RepRap Mendel. The return of the RepRap Mendel is complete... Muuhahaha!!


